Starting any iOS simulator on macOS
When you’re coding something, especially a Frontend solution, you’ll very likely want to test your web app on different devices. On macOS, you can choose from a range of simulators, which can be installed on your system. No need to buy devices, as the simulators, especially on Apple Silicon devices, are very accurate when testing websites.
How to choose a simulator to start
First of all, you need to have Xcode installed, which can (and should only) be downloaded from the App Store. After the download, run Xcode for at least one time, so that additional tools can be installed by Xcode automatically.
After that, the following command should be available on your device.
xcrun simctl list
This command prints out quite a long list of devices. Some of them (I noticed the last ones) also contain a UUID. This UUID can now be used to instruct the tool to launch that simulator. Simply run the following command, where is the value you have to insert.
xcrun simctl boot <UUID>
Automation for starting Xcode simulator
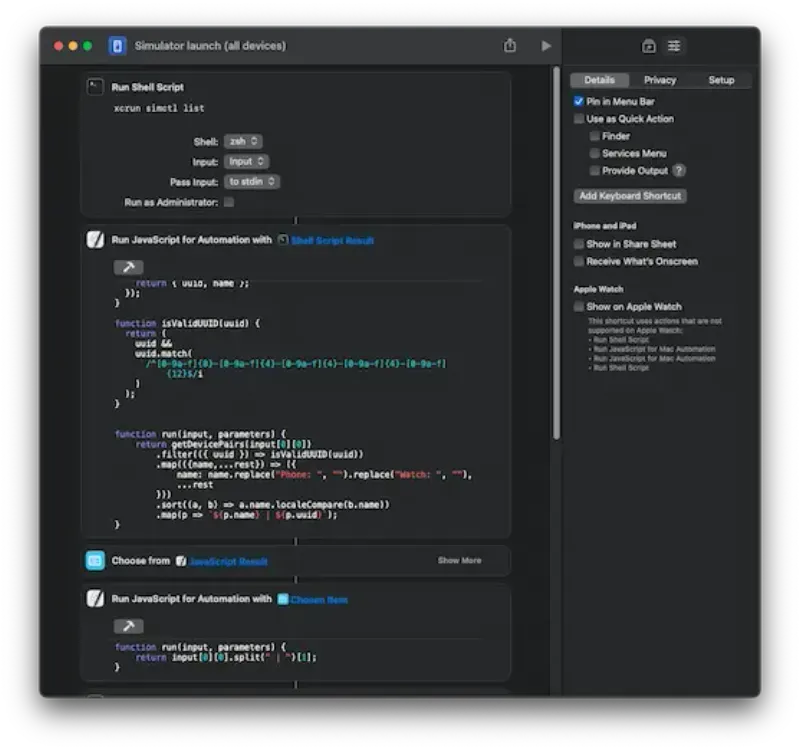
Of course, this becomes quite tedious if you often need to boot different simulators. I therefore wrote a little script in Apple’s “Shortcuts”-app (https://github.com/flaming-codes/shortcuts-simulator-launch). It reads all available devices, parses them and then provides a list of names to choose from. That way you can basically launch any installed simulator with two clicks.
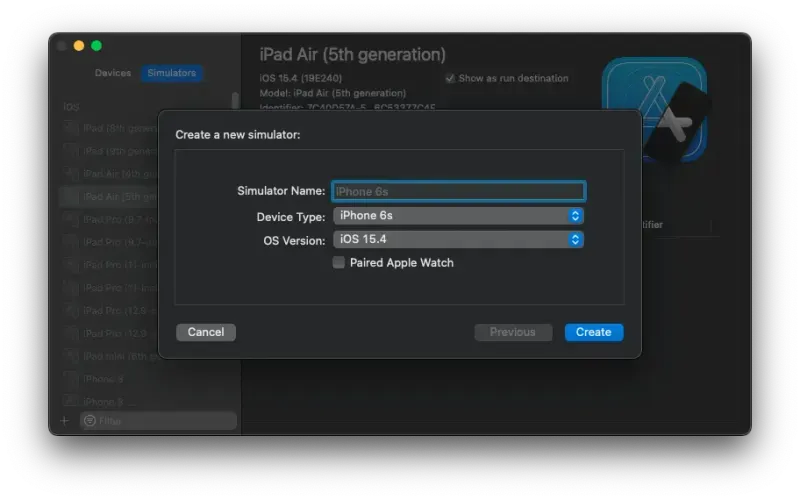
How to create new simulators in Xcode
If you ever need to create a new simulator, simply follow these steps.
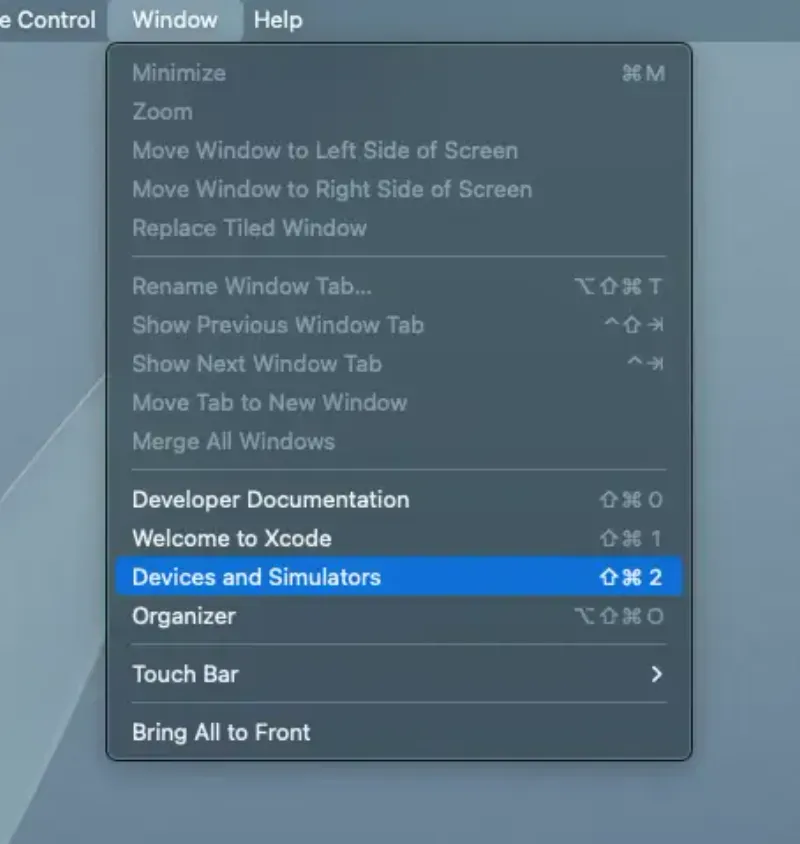
First, start Xcode. You don’t need to select any project. Now simply click “Window” in the Menu Bar and select “Devices and Simulators”.
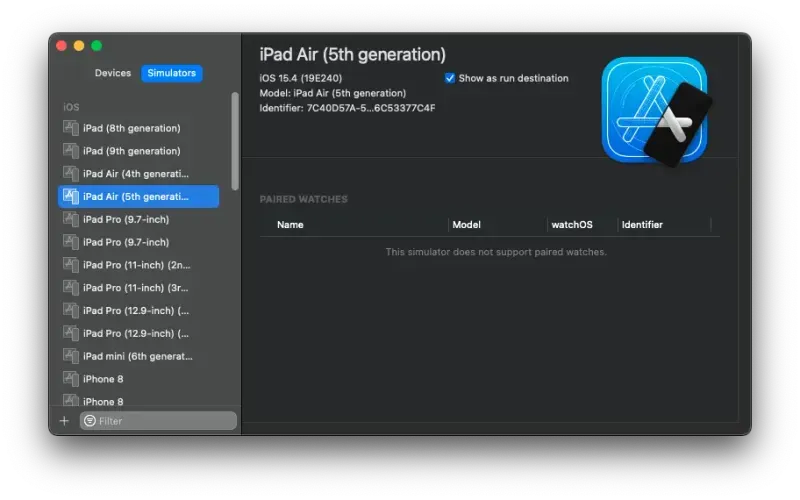
The new window shows you a list of all available simulators. Click the “plus”-icon in the bottom left corner to create a new one.
Now simply choose the device you want, give it a name and save the configuration. That’s it!