Teleportation in React.js
Did you know that React provides a special and very powerful component called “Portal” that can mount its children in a completely different place inside your app? If not, it’s time to learn something new!
The anatomy of a React.js Portal
Here’s a quick overview of how the Portal-component in React.js works before.
- Somewhere in your code, you mount an element that will host the Portal’s children
- Then you get a reference to this element
- Somewhere else in your app, you then mount the Portal-component and pass the reference obtained from the host-element
- Everything that is now mounted inside the Portal will actually be mounted in the host from the first step
To better understand what is going on, I’ve created the following simple visualizations to illustrate the Portal-functionality.
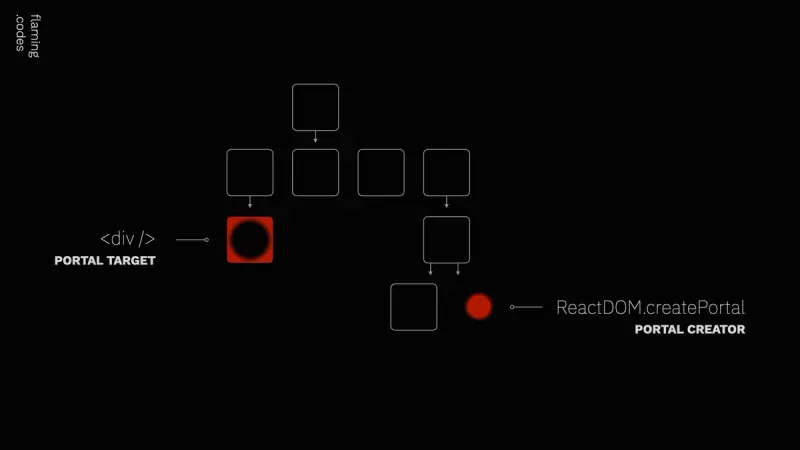
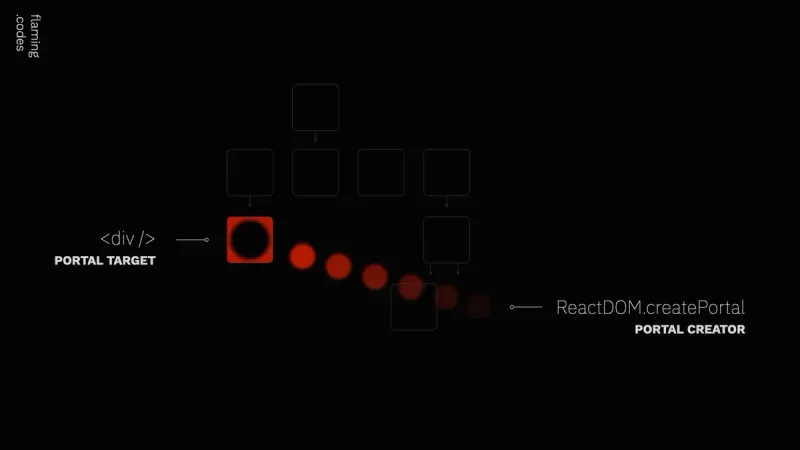
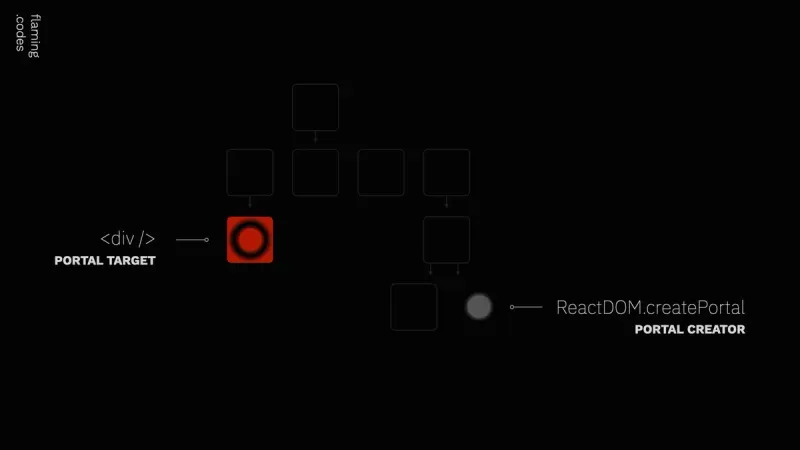
Building on these images, the following graphics show the same process, but this time with simplified code examples.
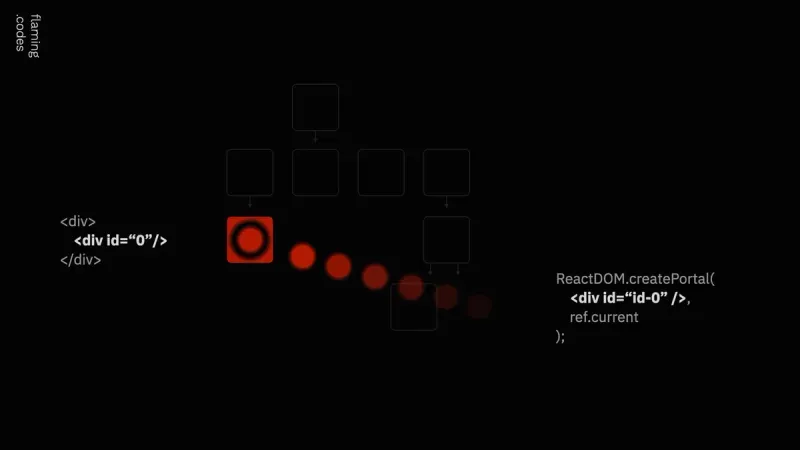
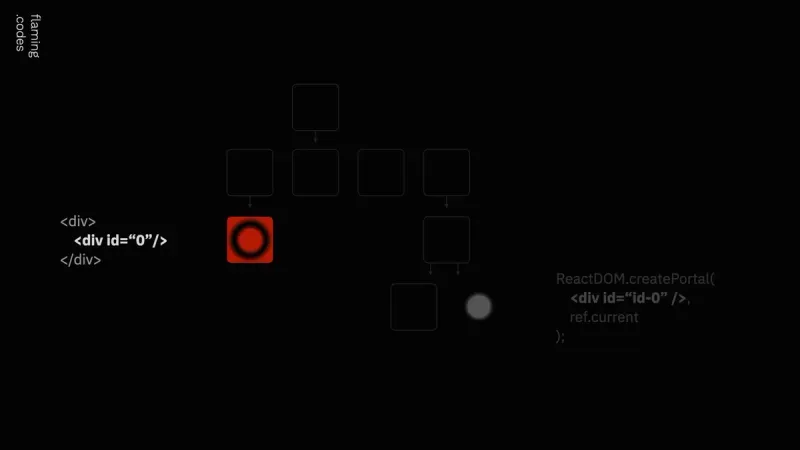
The Portal is even more powerful than you might think initially. It even allows to render multiple children from multiple Portals into the same target element. The order of mounting of the Portals also defines the order of the elements in the host.
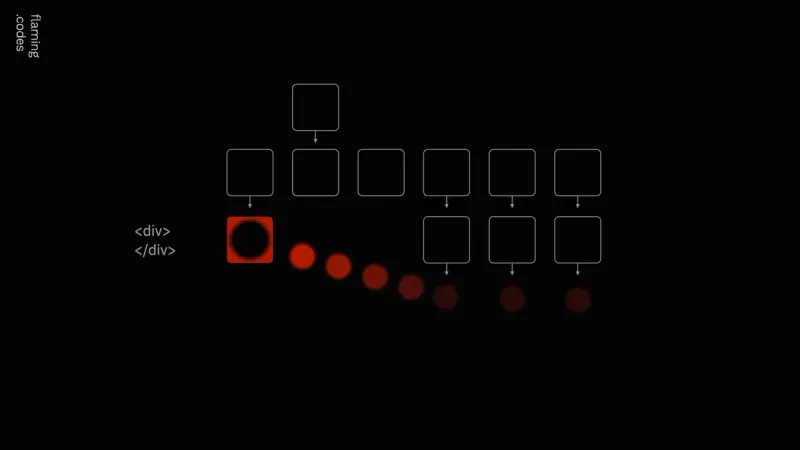
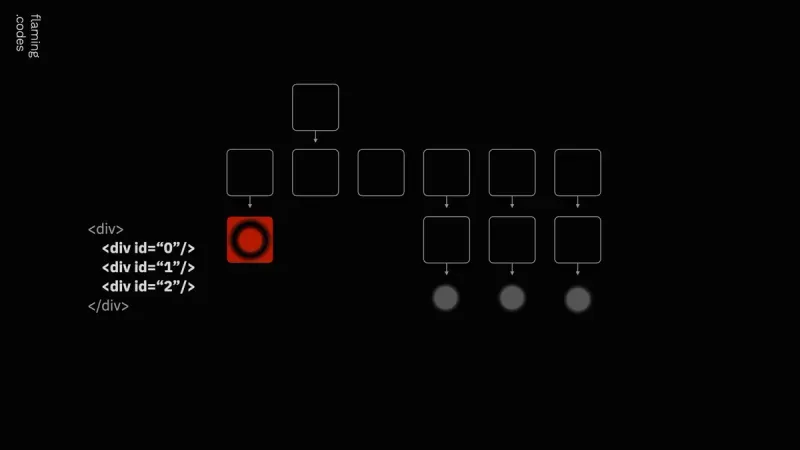
Sharing the reference to the host-element that will contain all the teleported children is also very easy. The official documentation describes the usage of document.getElementById, but you can also use React.js’ useRef-hook. The following code example demonstrates a simple implementation that shows everything described until now.
import React, { useEffect, useRef, useState } from "react";
import ReactDOM, { createPortal } from "react-dom";

//
// Link to sandbox:
// 👉 https://codesandbox.io/s/react-16-8-0-forked-d8lm1?file=/src/index.js:0-1067
//

// A simple demonstration of the React-Portal
// w/ multiple portals for the same target.
function App() {
  const ref = useRef(null);
  const [isRefReady, setIsRefReady] = useState(false);

  // Run one more render to actually
  // show the content of our portal.
  // This is necessary, as the setter
  // for the 'ref' alone won't trigger
  // a render.
  useEffect(() => {
    setIsRefReady(Boolean(ref));
  }, []);

  return (
    <div>
      <div>
        {/* The 'target' aka host for our portals. */}
        <header ref={ref} style={{display: "flex", gap: 8 }} />
        <hr/>
      </div>
      <h1>
        Debug
      </h1>
      {isRefReady && createPortal(<button>one</button>, ref.current)}
      {isRefReady && createPortal(<button>two</button>, ref.current)}
      <div>
        {isRefReady && createPortal(<button>three</button>, ref.current)}
      </div>
    </div>
  );
}

ReactDOM.render(<App />, document.querySelector("#root"));
How the Portal-component enables simpler coding
Probably the most common use case for the React.js Portal is the implementation of a Modal component. You can simply define the target at the root of your app’s tree and use the Portal-component to mount a modal from everywhere, reliably floating above all content.
Another use case I actually implemented is the usage of a tab container. As a tab container requires both a tab item itself as well as the content to render when the tab is selected, I simply define two hosts, one for the tab-row and the other for the selected content.
Then I just mount an array of components that each use a portal for the tab-item as well as selected content. This allows me to place the business logic where it actually belongs - in each separate component.
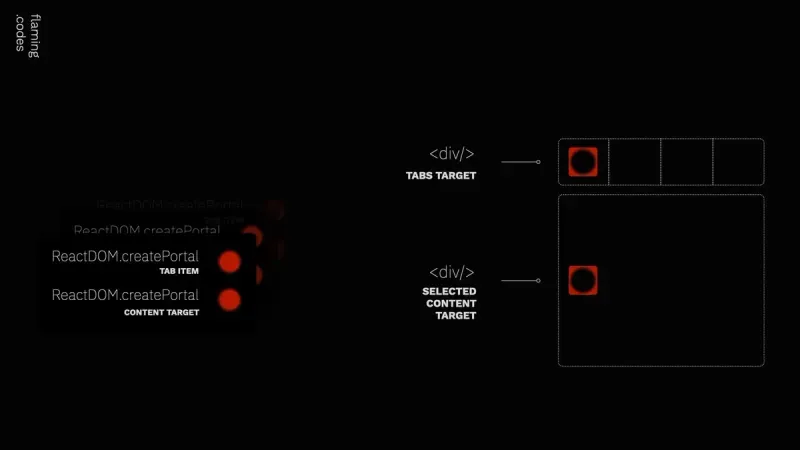
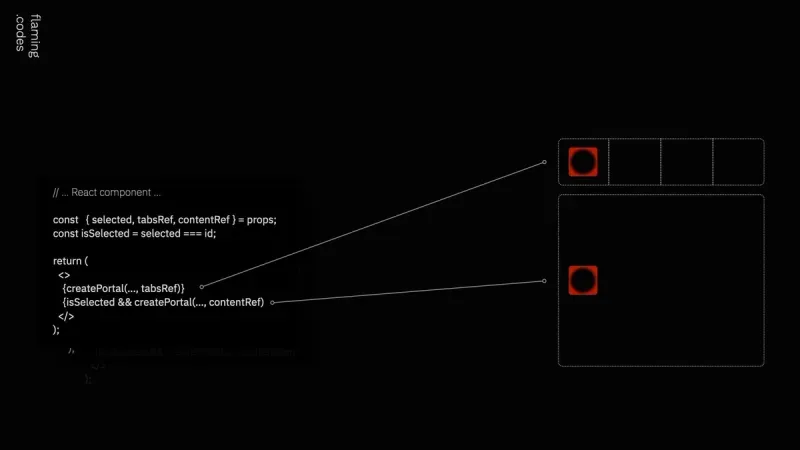
There are certainly even more interesting use cases for the Portal-component. The biggest advantage I think it enables is the tight coupling of business logic in a single component, whose children get then mounted in different places. This pattern allows for great flexibility and customisation, but can lead to confusion in your codebase how the views are actually related.
Please also take a look at the official documentation for all details regarding React.js Portals.