כתיבת תוסף xbar ב- Javascript
כפרויקט סוף שבוע רציתי לכתוב תוסף פשוט ל- xbar, יישום שמעדתי את זה לאחרונה. xbar עצמו כתוב בשפת התכנות "Go" ומשתמש ב- "Wails" כשירות הבסיס שלו כדי לאפשר למפתחים לכתוב ערכי תפריט מותאמים אישית עבור שורת התפריטים ב- macOS (כן, כרגע הוא מוגבל ל- macOS בלבד).
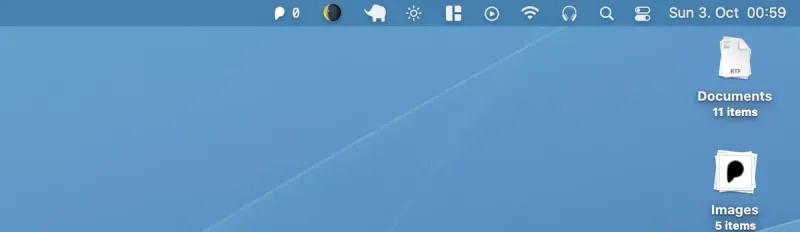
הדבר הנחמד ב- xbar הוא שהוא תומך במגוון רחב של שפות תכנות, הכוללות גם Javascript. בתור אתר אינטרנט בעצמי, רציתי לראות כמה קל לכתוב תוסף מותאם אישית המתחבר ל- Plausible.io, שירות הניתוחים ידידותי לפרטיות שלי. המטרה היא להציג את כל המשתמשים הנוכחיים הנמצאים כעת ביישום אינטרנט זה. נכון לכתיבת הבקשה למשוך עדיין בבדיקה.
התקנה בסיסית של xbar
ניתן פשוט להוריד את xbar ולהתקין אותו ב- Mac שלך. ברגע שאתה מפעיל אותו בפעם הראשונה, ניתן להשתמש במסך המכיל את כל התוספים להורדה ולפרסום כדי להשיג את התוסף שאתה רוצה.
תהליך ההתקנה פשוט מעתיק את קוד המקור של התוסף (קובץ בודד לכל תוסף) לתיקייה מיוחדת, שממנה xbar קורא את כל התוספים המותקנים כעת. כדי להתחיל לכתוב תוסף משלך, אתה פשוט יוצר קובץ בספרייה ומתחיל לפרוץ. נקי!
מוסכמה של שם קובץ xbar
שם הקובץ מורכב משלושה חלקים, כולם מופרדים בנקודה.
- שם התוסף הייחודי שלך
- מרווח הזמן בו הקוד שלך מבוצע, בדומה למשרת CRON
- סיומת הקובץ הנפוץ
plausible.1m.js
קידוד תוסף xbar ב- JS
עכשיו אתה מוכן להתחיל לקודד! ראשית כלול את הנחיית shebang הנדרשת כדי לספר ל- xbar היכן יש למצוא את מופע הצומת.
#!/usr/bin/env /usr/local/bin/node
החלק הבא הוא הוספת מספר נתוני מטא. כמובן שאפשר להשמיט את זה לפיתוח מקומי, אבל הנה מה שאני משתמש בו עבור הפלאגין Plausible.
// Metadata allows your plugin to show up in the app, and website.
//
//  <xbar.title>Plausible Tracker</xbar.title>
//  <xbar.version>v1.0</xbar.version>
//  <xbar.author>Tom Schönmann</xbar.author>
//  <xbar.author.github>flaming-codes</xbar.author.github>
//  <xbar.desc>See who's on your site at-a-glance.</xbar.desc>
//  <xbar.dependencies>node</xbar.dependencies>
//  <xbar.abouturl>https://flaming.codes</xbar.abouturl>
//  <xbar.image>https://raw.githubusercontent.com/flaming-codes/xbar-plausible-stats/main/plausible-icon-36-36-144.png</xbar.image>
וזה כל מה שנדרש כדי שהתוסף שלך יפעל. כעת יש לך קנבס שבו תוכל לקוד ב- Javascript טהור, המבוצע על ידי מופע Node.js של המשתמש. המשמעות היא שיש לנו גישה לכל חבילות הצומת המרכזיות, כגון "https". במקרה השימוש שלי, זה כל מה שאני צריך, מכיוון שמעקב אחר משתמשים פשוט דורש אחזור מה- API Plausible.io.
קטעי הקוד הבאים מראים את החלק הרלוונטי ביותר שלדעתי שווה לדבר עליו. הקוד המלא זמין במאגר הציבורי הקשור, קישור בתוסף בסוף דף זה.
// Here you see how to make network
// requests with 'https'-only.
// This is a native node-lib that
// works w/ data streams, as you'll see.

const https = require("https");

// Those have to edited by the
// user directly in the file,
// after it has been downloaded
// (aka installed)!
const SITE_ID = "";
const API_KEY = "";

// ... other code ...

async function fetcher() {
  return new Promise((resolve, reject) => {
    let body = "";
    const request = {
      host: "plausible.flaming.codes",
      path: `/api/v1/stats/realtime/visitors?site_id=${SITE_ID}`,
      method: "GET",
      headers: {
        Authorization: `Bearer ${API_KEY}`,
      },
    };

    try {
      const req = https.get(request, (res) => {
        res.on("data", (data) => {
          body += data;
        });
        res.on("end", () => {
          resolve(JSON.parse(body));
        });
      });

      req.on("error", (error) => {
        console.error(error);
      });

      req.end();
    } catch (error) {
      reject(error);
    }
  });
}
// I've implemented an array of tuples
// that hold an icon + count threshold
// when to active it.

// The first entry doesn't render a
// string (which can be direclty used),
// but rather a mapping that results in
// the following code:
//
// `image="..." font=Menlo color=white`
//
// This is a special syntax that tells
// xbar to render a base64 image w/
// a custom font and color.
//
// 'plausibleIconWhite' is just the string
// for the base64-image.
const stepIcons = [
  [0, `${plausibleIconWhite} Menlo white`, "image font color"],
  [5, "💫"],
  [10, "⭐️"],
  [50, "🌟"],
  [100, "⚡️"],
  [500, "💥"],
];
// Actually rendering stuff in xbar
// is super simple - just output it
// with console.log(...).
//
// As you'll see, '---' define
// separator. The first log-call
// gets rendered as acutal menu item.
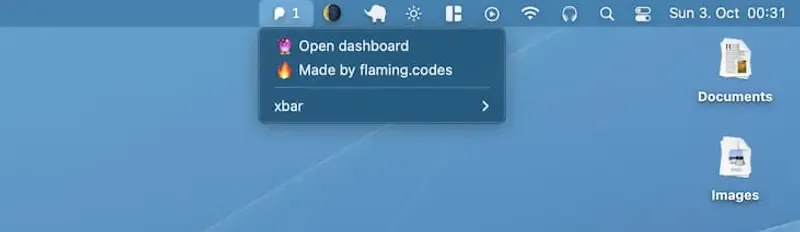
const linksMenu = [
"---",
`🔮 Open dashboard | href=https://plausible.flaming.codes/${SITE_ID}`,
`🔥 Made by flaming.codes | href=https://flaming.codes`,
];
function renderError(props) {
const { error } = props;
const output = [
"❔",
"---",
"No data accessible",
"Please check your user data",
...linksMenu,
];
console.log(output.join("\n"));
}
// Finally, I defined a single function
// where everything starts. This function
// just gets called to kick everyting off.
// Plain JS, it's that simple.

async function render() {
  const { data, error } = await fetcher()
    .then((data) => ({ data }))
    .catch((error) => ({ error }));

  if (data >= 0) return renderData({ data });
  if (error) return renderError({ error });
}

render();
קידוד ל- xbar הוא קל
כל התהליך לקח לי כמה שעות להשלים, בעיקר בדקתי את ה- API מ- xbar וכן שיחקתי עם תצורות שונות לסטיילינג. בסך הכל, כתיבת תוסף פשוט כמו זה היא ממש לא מאמץ שממש כיף לעשות. אם יש לך כמה שעות פנויות, כדאי לנסות גם את זה!
אני חושב שמה שמדבר בעיקר על xbar הוא הזדמנות הסקריפט שהפיתוח הגמיש והמהיר הזה מאפשר. אתה יכול לכתוב עוקבים מותאמים אישית עבור הגדרות הענן או שירותי הניתוח שלך, כך שהמדדים כולם יראו במבט אחד בשורת התפריטים שלך ב- macOS. אני אוהב את זה!